

















The Ultimate Guide to Restoring Tile Grout: Proven DIY Techniques and Professional Strategies
Summary of the Best Quick Method
To clean dirty grout lines rapidly, combine baking soda with a splash of water to form a thick spread and apply it directly over the joints. Mist this layer using standard white vinegar and allow the fizzing action to work for roughly 10 to 15 minutes. Agitate the lines vigorously with a rigid scrubbing brush. Flush the residue away using warm water. Wipe the entire surface completely dry. Coat the joints with a premium grout sealer once all moisture has evaporated. This straightforward technique lifts embedded grime, cloudy soap scum, and minor stains across kitchen and bathroom tile layouts. It remains entirely safe for use on standard porcelain and ceramic tile installations.
Tile grout accumulates deep dirt incredibly fast. The material naturally absorbs liquid spills. It holds onto hardened soap film and mineral scaling from hard water. Inside residential bathrooms, it locks in ambient moisture and breeds black mold. Across kitchen backsplashes and floors, it rapidly pulls in airborne grease.
When these cement joints turn dark and dingy, many homeowners scrub for hours with very little to show for it. Fortunately, you do not need to endure harsh chemical fumes, endless physical exhaustion, or frustrating guesswork to achieve a spotless finish. You simply need to align your cleaning method with the specific type of stain accumulation you are dealing with.
The experienced team at Mobi Cleaning Canada handles professional tile and grout restoration every single day. Our crews regularly revive tiled floors, shower enclosures, kitchen backsplashes, and high-traffic home entryways. Over the years, we have mastered exactly what delivers results and what wastes your time.
This comprehensive homeowner’s guide outlines the most effective DIY strategies to wash your grout lines, identifies the perfect cleaners for every unique stain, and shows you how to shield your tile joints from future discoloration. It also highlights exactly when scheduling a professional deep clean is the smartest and safest option for your property.
Why Grout Requires Specialized Cleaning Attention
Tile grout is highly porous by nature. It functions like a rigid sponge, sucking up dark liquids and trapping microscopic residue deep within its internal structure. Everyday dirt settles permanently into these tiny surface voids, sticky soap films dry out and create a hard crust, hard water leaves behind chalky mineral films, and mold spores flourish inside damp joints that never get a chance to ventilate properly.
To pull embedded grime out of tile grout successfully, your routine must include three vital elements:
- A specialized cleaning solution capable of sinking deep into the porous material
- Adequate dwelling time to let the cleaning formula break down the bond of the stain
- A properly shaped, rigid bristle brush designed to physically dislodge the packed debris
If you skip or rush past any of these three core requirements, your grout lines will likely look just as dark and neglected after you rinse the floor.
The Most Reliable Method for Routine Grout Maintenance
This classic approach easily dissolves everyday foot-traffic dirt, minor discoloration, and dull bathroom soap film. It stands as the safest and most effective strategy for managing standard ceramic and porcelain tile assemblies.
Necessary Supplies
- Fresh baking soda
- Warm tap water
- Plain white vinegar
- A standard spray bottle
- A heavy-duty grout detailing brush or a rigid old toothbrush
- Clean microfiber cloths
Step-by-Step Directions
- Stir baking soda with a tiny bit of water until it forms a spreadable, heavy paste.
- Smooth this paste evenly along all your discolored grout joints.
- Pour pure white vinegar into your spray bottle.
- Mist the vinegar directly over the baking soda paste to trigger a deep bubbling reaction.
- Permit the foaming mixture to work into the pores for 10 to 15 minutes.
- Scrub down the grout channels utilizing short, firm, back-and-forth strokes.
- Flush the loosened grit away using clean, warm water.
- Meticulously dry the entire tiled surface with a fresh microfiber towel.
- Apply a high-quality protective sealer once the joints are completely dry.
Important Note: While vinegar is perfectly safe for standard grout and synthetic tiles, you should never apply acidic vinegar to natural stone installations like marble, slate, or travertine.
The Best Strategy for Stubborn, Deeply Discolored Grout
When your grout channels turn yellow, dark brown, or heavily gray inside busy hallways and kitchens, you require a much more potent chemical reaction. Combining baking soda with standard hydrogen peroxide creates a powerful oxygenating mix that lifts deep, historical stains.
Necessary Supplies
- Baking soda
- Standard 3% hydrogen peroxide
- A rigid bristle scrub brush
- Protective cleaning gloves
- Fresh microfiber towels
Step-by-Step Directions
- Combine two parts baking soda with one part hydrogen peroxide to create a smooth, slightly runny slurry.
- Coat the stained tile joints thoroughly with the peroxide mixture.
- Allow the solution to dwell on the problem areas for 10 to 20 minutes.
- Work the brush deep into the channels to lift the dark discoloration.
- Rinse the floor or wall thoroughly using warm water.
- Meticulously clear away all remaining moisture with a clean cloth.
This oxygen-rich technique works wonders for brightening dull grout lines and pulling out long-standing dirt. Avoid utilizing peroxide on tinted or colored grouts without completing a hidden spot test first, as it can occasionally bleach the pigment out.
The Best Technique for Kitchen Grease and Oil Buildup
Standard dish detergents are specifically formulated to cut through heavy grease bonds far better than basic baking soda. Use this approach for greasy kitchen floors and food-spattered stove backsplashes.
Necessary Supplies
- Boiling or very hot water
- Concentrated liquid dish soap
- A stiff-bristled utility brush
- A clean wash bucket
- Absorbent cleaning rags
Step-by-Step Directions
- Mix a generous squirt of concentrated dish soap into a bucket of very hot water.
- Pour the hot, soapy liquid directly over the kitchen grout lines or saturate your scrub brush in the bucket.
- Allow the degreasing solution to sit on the greasy areas for roughly 5 minutes.
- Scrub the channels firmly to break apart the bound cooking oils and fat residues.
- Wash the area thoroughly with fresh, soapy-free water.
- Dry the flooring or backsplash completely to prevent slippery spots.
The Best Routine for Eradicating Mold and Mildew
Fungal mold thrives inside damp tile lines that remain wet for long stretches of time. Utilizing a specialized bleach gel works incredibly well for vaporizing dark mold spots on porcelain or ceramic shower walls.
Necessary Supplies
- Thick bleach cleaning gel
- Rubber or nitrile safety gloves
- A detailing scrub brush
- Proper room ventilation (open windows or turn on exhaust fans)
Step-by-Step Directions
- Run a thin, precise line of the thick bleach gel directly along the mold-stained grout tracks.
- Allow the sanitizing chemical to dwell undisturbed for 5 to 10 minutes.
- Agitate the joints gently with your detailing brush to clear out the remaining spores.
- Flush the entire tiled area down thoroughly with plenty of warm water.
- Wipe the surface completely dry to discourage new mold from taking root.
Critical Chemical Safety Warning: Never mix chlorine bleach with vinegar, ammonia, or hydrogen peroxide, as doing so generates highly toxic, dangerous gases. Additionally, avoid using bleach on natural stone surfaces to prevent severe chemical etching and damage.
The Premier Method for Intensive Restorative Cleaning
Oxygenated bleaching powders serve as a highly effective agent for eliminating stubborn discoloration (most homeowners recognize this product category by the brand name OxiClean).
Necessary Supplies
- Powdered oxygen bleach compound
- Lukewarm tap water
- A heavy-duty utility bucket
- A stiff-bristled scrub brush
- Absorbent cleaning towels
Step-by-Step Directions
- Dissolve the powdered crystals completely in warm water according to the manufacturer’s packaging ratios.
- Flood or spray the active solution directly onto the discolored tile joints.
- Allow the liquid to saturate the porous channels for 10 to 20 minutes.
- Scrub the channels firmly to dislodge the deep-seated particles.
- Wash the entire surface thoroughly with fresh, clean water.
- Wipe the area dry using a clean microfiber cloth.
This specific strategy delivers exceptional results on weathered, historical grout that fails to react to lighter, everyday cleaning products.
Utilizing High-Temperature Steam Systems
Thermal steam detailing relies on extreme heat to loosen embedded soils completely without needing harsh synthetic chemicals. Many commercial steam units generate temperatures of 212°F, which easily emulsifies baked-on grime and neutralizes surface mold colonies.
How to Execute Steam Detail Processing
- Fill the internal reservoir of the steamer with pure water.
- Wait for the heating element to reach maximum operational pressure.
- Target the narrow jet nozzle directly at the stained grout tracks.
- Glide the wand slowly across the floor to give the heat enough time to melt the packed dirt.
- Instantly wipe away the emulsified muck utilizing a fresh cloth.
- Re-treat stubborn spots as needed to restore the original color.
Thermal vapor processing represents one of the primary methods we deploy during our premium residential services because it sinks deep into the cement structure. It performs beautifully on standard ceramic and porcelain floor layouts; however, you must never apply intense steam over crumbling, loose, or physically damaged grout. Avoid thermal treatments on sensitive varieties of natural stone unless the primary quarry manufacturer explicitly approves it.
Essential Equipment for Restoring Tile Joints
Specialized Scrubbing Brushes
- A narrow, rigid grout brush for targeting tight, compact areas.
- A heavy-duty power drill brush attachment for rapidly cleaning expansive tile floors.
- A recycled, stiff toothbrush for detailing hard-to-reach corners and edges.
Supporting Maintenance Gear
- Heavy-duty spray bottles for product application.
- Plush microfiber cloths for absorption and drying.
- Durable rubber or nitrile safety gloves.
- Thick foam knee pads to prevent physical fatigue.
Critical Warnings and Safety Guidelines
- Never combine chlorine bleach with acidic white vinegar under any circumstances.
- Never blend liquid bleach with hydrogen peroxide formulas.
- Avoid applying white vinegar to alkaline materials like marble, travertine, or limestone.
- Complete a small spot test with aggressive cleaners on tinted grout to check for fading.
- Keep windows wide open to maintain excellent cross-ventilation when using bleach or chemical agents.
- Wear thick protective gloves if your skin is prone to irritation or sensitivity.
A significant portion of severe tile damage stems directly from homeowners utilizing the wrong chemical solution on an incompatible material. When you are uncertain about compatibility, choose a basic mixture of baking soda and fresh water, as it is incredibly gentle and completely safe.
Recommended Operational Cleaning Intervals
Residential Tile Floors
Deep clean your main tile floors once every month to block foot-traffic dirt from embedding permanently into the cement lines, and make a conscious habit of blotting up liquid spills instantly so they do not soak deep into the pores and create stubborn stains that become far more difficult to extract later.
Shower Enclosures and Baths
Mist the tiled walls down after every single shower utilizing a homemade solution of half white vinegar and half tap water to dramatically decelerate sticky soap scum accumulation. Do not spray this acidic formula onto natural stone tile. Wipe the wet walls down thoroughly once a week to prevent stagnant moisture from sitting continuously on the grout tracks.
Kitchen Cooking Zones
Wipe clean the backsplash areas every single week to clear away cooking oils, grease splatters, and steam residues before they harden into a crust, and wash your main kitchen floors every seven to fourteen days to prevent loose dirt and fallen food crumbs from sinking deep into the porous grout.
Proven Strategies to Keep Your Tile Grout Clean for Longer
- Thoroughly dry all wet tile surfaces immediately after showering or mopping the floor.
- Promptly repair plumbing drips or leaks that keep tile sections perpetually wet.
- Switch to liquid body wash instead of traditional bar soap to drastically reduce scum buildup.
- Sweep or vacuum the floor completely before mopping to keep loose sand out of the grout tracks.
- Place high-quality walk-off mats at every entryway to catch exterior soils before they enter.
Why Protective Grout Sealing is Non-Negotiable
Coating your tile joints with a specialized sealer shields the porous material against permanent liquid staining, and most residential installations require a fresh application every 6 to 12 months. Applying a premium protector ensures that liquids form beads directly on the surface, allowing you to wipe up spills before they cause discoloration.
Recommended Product Types
- Deep-penetrating solvent or water-based grout sealers.
- Advanced, high-quality spray-on protective formulas.
- Precision brush-on liquid sealers designed for tight borders and accent walls.
How to Correctly Apply the Protector
- Deep clean the tile lines meticulously until they are spotless.
- Permit the entire assembly to dry undisturbed for a full 24 hours.
- Smooth on a single, uniform thin layer of the protective sealer.
- Wait a few minutes to allow the cement to absorb the product fully.
- Brush on a secondary coating if the material remains highly porous.
- Keep the treated area completely dry and free of foot traffic for another 24 hours.
When to Call the Experts at Mobi Cleaning Canada
Certain severe grout defects demand far more than basic DIY remedies. If you observe any of the following warning signs across your bathrooms, kitchens, or main floors, we strongly suggest calling in our professional team:
- The cement channels remain dark, gray, or dingy even after aggressive chemical scrubbing.
- Fungal mold or mildew blooms return to your shower walls within days of being cleaned.
- The existing grout lines are actively cracking, crumbling, or missing entirely.
- The surrounding tile faces look cloudy, scratched, or dull following a DIY cleaning.
- You are dealing with expensive, delicate natural stone materials that etch easily.
- You want to secure multi-year, commercial-grade protection against future liquid stains.
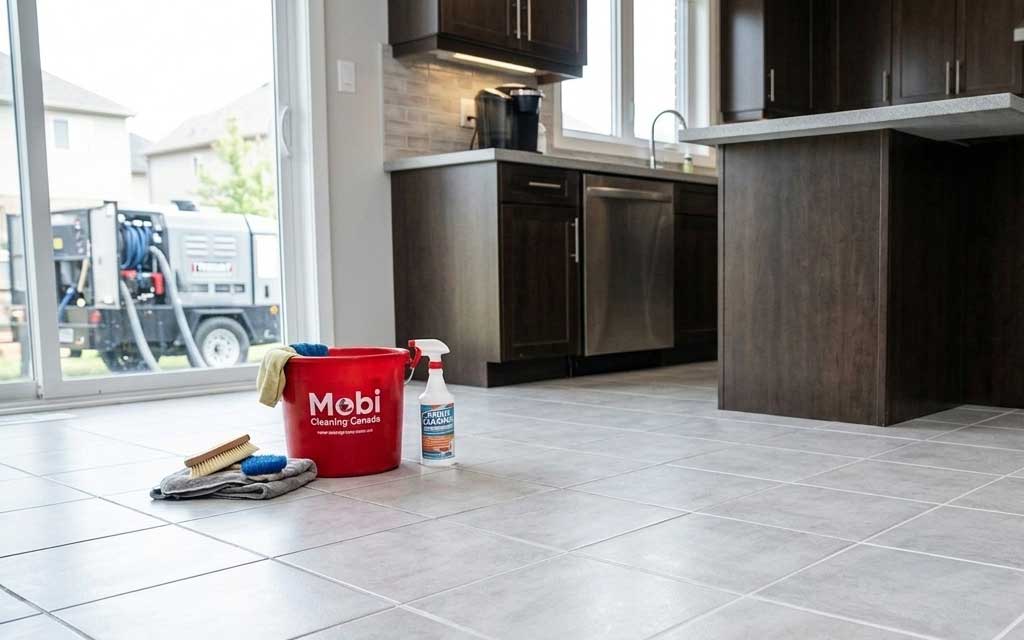
At Mobi Cleaning Canada, we deploy heavy-duty truck-mounted steam extraction systems, specialized industrial-strength cleansers, and advanced rotary tool attachments that reach significantly deeper than standard consumer brushes. We successfully draw out hidden chemical residues trapped well below the visible surface, extending the overall lifespan of your tile work while keeping it cleaner between scheduled maintenance visits.
If your existing tile joints are completely deteriorated or stained beyond the point of repair, our specialized crew can re-color or re-grout the entire installation, restoring a brand-new aesthetic without the heavy price tag of a full demolition remodel.
Our Professional Restoration Process
- Conduct a meticulous initial inspection of the tile matrix.
- Complete a diagnostic surface compatibility test.
- Emulsify the grime utilizing a specialized cleaner matched to the specific stain type.
- Vaporize and loosen deep-seated buildup utilizing commercial-grade steam.
- Extract the remaining slurry using advanced mechanical counter-rotating brushes.
- Flush the entire floor with high-pressure, clean water rinses.
- Smooth on a high-grade protective chemical sealer.
- Meticulously buff the tile faces to deliver a brilliant, crystal-clear finish.
Connect with our customer service team today if you want to secure a safer, deeper, and completely hassle-free clean for your home’s tile investments.
Frequently Asked Questions Regarding Grout Maintenance
What is the absolute fastest way to wash dirty grout lines?
The most rapid DIY solution is applying a thick baking soda slurry paired with a direct white vinegar misting. Allow the bubbling compound to dwell over the joints for 10 to 15 minutes. Scrub firmly, flush with clean water, and wipe the area completely dry.
This specific technique delivers quick results because the baking soda lifts surface dust while the acidic vinegar dissolves cloudy soap films and minor organic staining. Furthermore, the thick paste adheres perfectly to vertical wall lines, minimizing product waste. For expansive floor layouts, click a scrub brush attachment onto a cordless power drill to finish the agitation phase in half the time.
How do I restore my discolored grout back to a bright white look?
Utilize a paste mixed from fresh baking soda and standard hydrogen peroxide. Coat the lines, let the oxygenating action work, scrub the channels, rinse thoroughly, and dry the space completely. Duplicate the process on stubborn sections if necessary.
This oxygen-rich combination burrows deep into heavy discoloration, helping to whiten cement that has turned yellow or dark gray over years of use. The peroxide lifts old organic residue efficiently without generating toxic, volatile fumes. Exceptionally stubborn spots might demand a secondary application, particularly inside damp shower stalls and high-use walkways.
Is it possible to clean tile grout thoroughly without hard scrubbing?
Spread a runny paste of hydrogen peroxide mixed with baking soda over the problem zones. Let the mixture sit undisturbed for roughly 10 minutes, then simply wipe away the loosened muck. Reapply the paste directly onto heavy stains if needed.
The chemical reaction softens up bound grime, allowing you to lift the vast majority of the dirt away with a standard microfiber towel. This serves as an excellent alternative when you require a delicate approach or when manual scrubbing would take too much physical effort. For deeply embedded historical stains, extend the dwell time to a full 15 minutes before wiping the floor.
What specialized products do professional cleaning crews use?
Our technicians utilize commercial-grade emulsifiers, regulated high-pressure steam extraction machinery, and long-lasting specialized sealers. We select our exact technical process based on the chemical composition of the tile and the nature of the stain.
Our heavy-duty truck-mounted equipment digs substantially deeper into the pores than consumer-grade hand tools, completely extracting hidden soils that sit beneath the surface. Additionally, we apply advanced penetrative sealers that offer a much longer operational life than standard retail options, giving your tile assemblies superior barrier protection and a fresher appearance over the long term.
What is the ideal frequency for washing and sealing grout?
Execute a deep clean once every calendar month, and reapply a protective sealer every 6 to 12 months.
Maintaining a regular monthly schedule blocks abrasive dirt from settling permanently inside the pores of the cement. Meanwhile, applying a fresh coat of sealer establishes a strong defensive barrier that slows down stain penetration and reduces mold spore colonization. High-humidity or heavy-use spaces, such as residential kitchens and main bathrooms, frequently require more frequent upkeep.
Eradicate Stubborn Tile Stains With Mobi Cleaning Canada Today
If your home’s grout lines remain dark, stained, or shadowed even after extensive personal scrubbing, your tile work likely requires a commercial-grade intervention.
The certified team at Mobi Cleaning Canada is fully equipped to wash, restore, re-color, and seal tile joints across residential homes and commercial businesses alike. Our specialized extraction process pulls out the deep-seated silt trapped well within the material, safeguarding your real estate asset against future stains and moisture damage.
Call Us
778.801.8595
SEND US AN EMAIL
book@mobicleaning.ca
Text Us
778.801.8595
Contact Us For Cleaning Services
Real Results
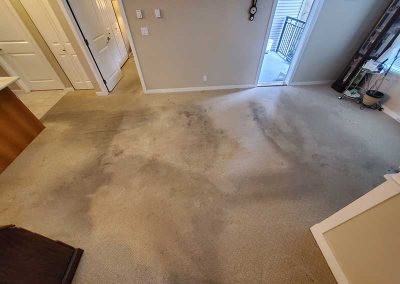
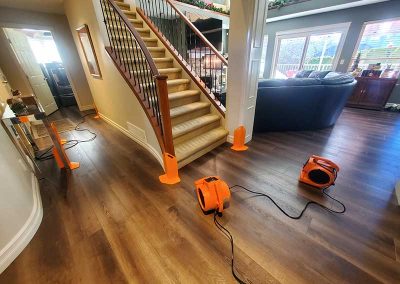
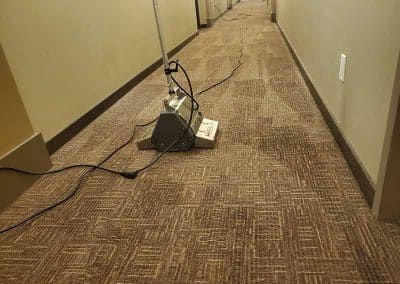
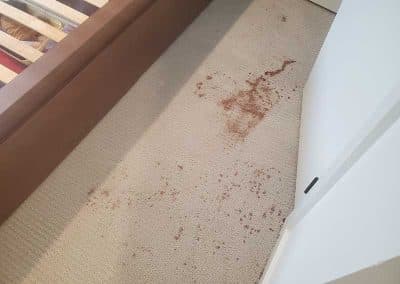
We take tremendous pride in the results we deliver for our clients. The photos speak for themselves.



Why Choose Us
Business License, Criminal Record Check, Trained Technicians, Professional Tools, Professional Solutions, Better Results and Quality, Transparent Pricing and no Hidden Fees, Health Benefits, Professional Operation of Tools, Mobi Cleaning Difference, Flexible Scheduling, On-Time, Maintenance, Great Competitive Value, Customer Satisfaction Focused, IICRC Trained, Green Cleaning, Reputation, Property Protection, Fast Drying Carpets, 100 Percent Satisfaction Guarantee, Experience, Professional Processes, First-Class Service, Fast Response Time, Free Consultation and Estimates, Competitive Pricing and Dedicated Account Manager