


The Ultimate Guide to Garage Cleaning and Organization
Is your garage overflowing with tools, sports gear, Christmas decorations, and piles of junk you have been meaning to sort out? You are definitely not the alone.
Many homeowners find their garages turning into messy junk rooms instead of the clean, organized spaces they should be. Imagine a clean garage where everything is in its proper place, where you can easily find your tools, and where you actually have enough room to park your car or set up a home workshop.
Reclaiming your storage space is easier than you think. Our step-by-step guide will show you exactly how to declutter, deep clean, and organize your garage so you can turn it into a functional space that actually works for you.
Step 1: How to Plan Your Garage Cleanout
Set a Date on Your Calendar
Pick a weekend or a block of time when you can fully commit to this project. Starting early in the morning is the best trick because you will have more energy to get things done before you get tired.
Get Your Family to Help
Turn the cleanout into a group project. Give everyone their own section of the garage to clear out, which makes the work go by much faster. When everyone helps out, they are more likely to keep the space tidy later on.
Empty the Whole Space
Start by moving absolutely everything out of the garage and onto your driveway. Emptying the room lets you see exactly how much junk you have and helps you plan your storage layout.
Use Temporary Storage Areas
If you have too much stuff, consider renting a temporary storage container or using your backyard deck to hold your belongings. This gives you plenty of open room to scrub the floor without feeling overwhelmed by all the clutter.
Step 2: Sorting and Decluttering Your Junk
Sorting through your gear is the most important step in any garage cleanout:
Group Your Items into Categories
Gather your belongings into matching piles like power tools, outdoor sports equipment, seasonal holiday decorations, and lawn and garden supplies. This makes it much easier to organize your shelves and find your stuff later.
Label Your Storage Spots
Before you put anything back inside, label your storage spaces. Put clear labels on your shelves, storage totes, and boxes so every item has a designated home.
Throw Away, Sell, or Donate
Figure out what items you want to throw out, recycle, or give away to local charities like Big Brothers or Salvation Army. If you have not used an item in over a year, it is time to get rid of it. Set up separate boxes for garage sale items, donations, and garbage.
Get Rid of Hazardous Waste Safely
Safely separate old household chemicals like leftover paint, toxic solvents, and used motor oil. Check your local municipal guidelines or Product Care Recycling to find the nearest eco-depot. Never throw these items in your regular trash can.
Step 3: How to Deep Clean Your Garage Floor
Now that your garage is completely empty, it is time to scrub away the dirt:
Sweep and Dust the Entire Room
Use an eco-friendly sweeping compound on the concrete to keep the dust from flying into the air while you sweep. Start at the very back of the garage and work your way out to the main garage door, making sure to clean out every corner and spiderweb.
Wash Concrete Floors and Remove Stains
Mix a heavy-duty degreaser with hot water and mop the entire floor down. For stubborn oil stains left behind by your car, use a laundry stain remover or make a thick detergent paste. Let the mixture sit on the oil spot overnight, scrub it hard with a stiff brush the next morning, and rinse it completely. For the best results, use a pressure washer to blast away deeply embedded dirt and grime from the concrete.
Fresh Paint and Floor Epoxy
Consider rolling a fresh coat of exterior paint onto the walls to make the room look brand new. A fresh coat of paint brightens up the space and protects the walls from moisture and humidity. You can also paint the floor with a garage floor epoxy kit, which seals the concrete, protects it from oil leaks, and makes it incredibly easy to sweep up in the future.
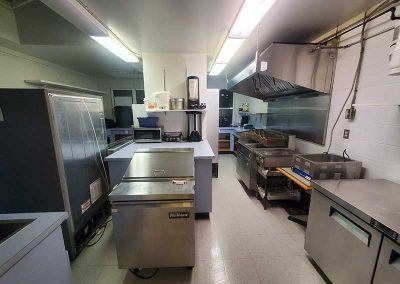
Step 4: Garage Storage Ideas and Organization
Smart storage solutions will turn your messy garage into a highly functional workspace:
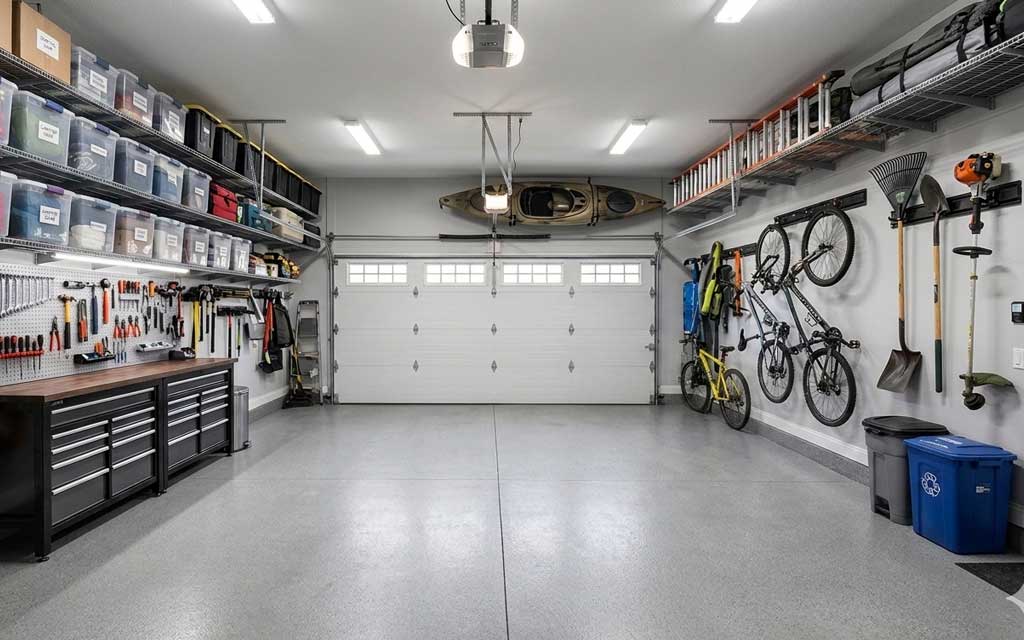
Install Heavy-Duty Garage Shelving
Put up sturdy wall shelves or freestanding metal storage racks. Always leave a little bit of extra shelf space for future purchases. Adjustable wire shelving is a great choice because you can change the heights whenever you want. Use heavy-duty wall anchors to make sure the shelves do not fall down under heavy loads.
Use Your Ceiling and Overhead Space
Lay strong plywood across your open ceiling joists to build cheap overhead storage for lightweight gear. This is the perfect spot to hide away plastic bins of holiday decorations or camping gear you only use once a year. You can also install ceiling-mounted storage racks to hold large items like kayaks or paddleboards.
Hang Gear on Wall Hooks and Pegboards
Install sturdy wall hooks to hang up heavy items like mountain bikes, ladders, extension cords, and brooms. Getting these items off the ground frees up valuable floor space. Putting up a pegboard is another awesome way to keep your hand tools organized, visible, and within arms reach.
Stackable Plastic Storage Totes
Put your smaller items into clear plastic bins with lids. Clear bins protect your gear from bugs and moisture, and you can easily see what is inside without opening them up. Buy matching tubs so they stack neatly together, and use color-coded labels for different categories.
Step 5: Easy Tips to Keep Your Garage Organized
Do a Quick Monthly Tidy-Up
Put a regular garage checkup on your schedule to keep the clutter from building up again. A quick 10-minute sweep and a habit of putting your tools back where they belong after every project will keep the space looking spotless.
Swap Your Gear Every Season
Rotate your storage bins based on the time of year. Keep your summer lawn mowers and bikes easy to reach during the warmer months, and swap them with your winter snow shovels and skis when the weather gets cold.
Find Organization Inspiration Online
Follow home improvement blogs and organization accounts on social media for clever storage hacks. Seeing photos of other clean garages is a great way to stay motivated to keep your own space neat and tidy.
When to Call a Professional Cleaning Company
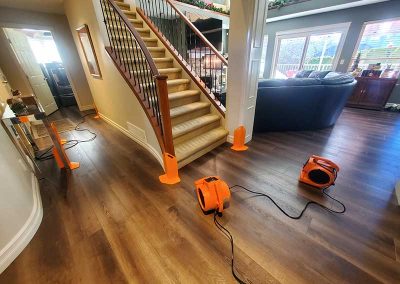
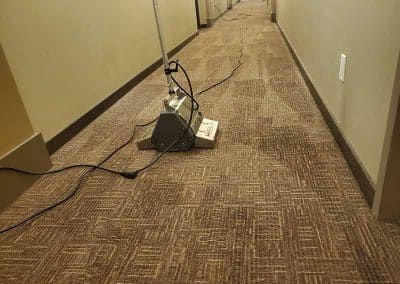
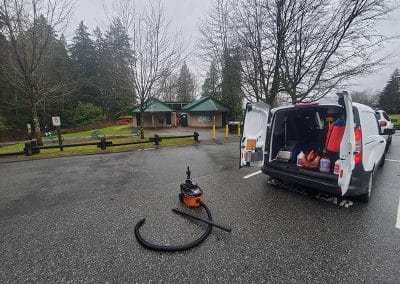
Sometimes, decades of built-up oil stains, heavy grime, and mildew are too tough to clean with basic household tools. If your concrete floors need professional power washing, or if your stored upholstery and rugs have been damaged by basement dampness and mold, Mobi Cleaning can do the heavy lifting for you.
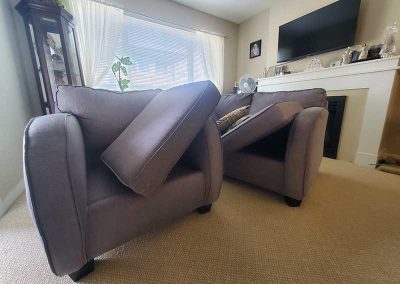
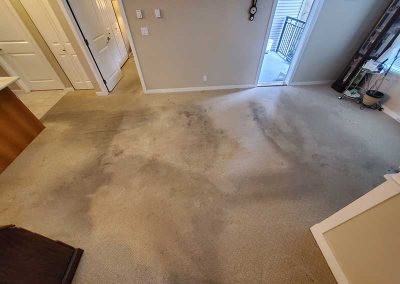
Our professional cleaning crews handle deep property cleanings, carpet stain removals, and upholstery washing so you can transition into your newly organized space without the stress.
Detailed Steps for Each Phase of Your Garage Cleanout
Planning Phase
Make a List of Cleanout Supplies
Before you start hauling items out, make sure you have all the necessary tools and cleanup supplies on hand:
- Brooms and dustpans
- Heavy-duty garbage bags
- Sticky labels and permanent markers
- Plastic storage bins and metal shelves
- Concrete degreaser cleaner and mops
- Dust-control sweeping compound
Set Clear Organization Goals
Define exactly what you want to achieve with your extra square footage. Do you want to build a dedicated woodworking workshop? Do you simply want a clean spot to park your car during wet BC winters?
Setting clear goals will guide your layout decisions and keep you focused on what matters. Write these goals down on a piece of paper and tape it somewhere visible to keep your motivation high while sorting.
Sorting and Decluttering Phase
Create a Five-Bin Sorting System
Set up designated staging areas on your driveway or lawn for different categories of items:
- Keep: Essential gear and tools that you use on a regular basis.
- Donate: Items in good condition that you no longer need, perfect for local BC charities like Big Brothers or the Salvation Army.
- Sell: Valuable items that are worth listing online or saving for a neighborhood garage sale.
- Trash: Broken, unsafe, or completely unusable items destined for the landfill.
- Recycle: Plastics, metals, and cardboard that can be safely processed.
Use a Cleaning Timer to Avoid Burnout
Set a timer on your phone for each sorting session to keep your momentum up and prevent exhaustion. Work in focused 30-minute intervals, taking a quick five-minute break between sessions. This time-management trick keeps a massive cleanup manageable and stops you from feeling overwhelmed by the pile of junk.
Ask Yourself Tough Decluttering Questions
When you are on the fence about keeping a piece of junk, ask yourself these practical questions to make a final decision:
- Have I actually used this item in the last 12 months?
- Does this item still function properly, or is it broken?
- Do I already own a duplicate item that does the exact same job?
Cleaning Phase
Start Cleaning from the Top Down
Always begin your deep cleaning from the ceiling down to the floor. Dust and wash your high shelves, light fixtures, and walls before you sweep or mop the concrete.
This ensures that any falling dirt, dust, or cobwebs will be caught and cleaned up at the very end. Use a damp microfibre cloth or a specialized duster so you do not just spread dry dust around the room.
Use the Right Cleaners for Concrete Stains
Different types of floor blemishes require specific cleaning solutions to lift completely:
- Oil and Grease Stains: Apply a heavy-duty laundry pre-spotter or a thick paste made from laundry detergent and water to tackle automotive leaks. Let it sit overnight, scrub it with a stiff brush, and rinse.
- Rust Stains: Apply a natural solution of white vinegar and water, scrub the spot thoroughly, and wipe it away.
Protect Your Concrete Floors Long-Term
Consider laying down heavy-duty floor mats or interlocking tiles to protect your concrete against future automotive leaks and fluid spills. This also gives your garage a clean, finished look and makes standing much more comfortable when working on DIY projects. Industrial rubber mats are highly durable, easy to wipe down, and provide excellent shock absorption against coastal dampness.
Organizing Phase
Divide Your Garage into Functional Activity Zones
Section off your garage floor plan into specific zones based on your daily BC lifestyle:
- Tool Zone: A central area for all your hand tools, hardware, and power equipment.
- Sports Zone: A spot for hockey gear, mountain bikes, golf clubs, paddleboards, and outdoor gear.
- Garden Zone: A dedicated corner for lawnmowers, soil bags, rakes, and yard tools.
- Long-Term Storage Zone: High shelves or overhead racks for seasonal items like holiday decorations used once a year.
Build a Custom Pegboard Wall
Install a heavy-duty pegboard wall right above your workspace to hang up your hand tools. This layout allows you to see all your gear at a glance, keeps everything within arm’s reach, and clears clutter off your work surfaces. You can easily customize the peg layout with specialized metal hooks, small shelves, and hanging plastic bins to fit your exact tool collection.
Add a Sturdy Workbench for DIY Projects
If you have enough open space, add a freestanding workbench to create a dedicated station for home repairs, crafting, or minor vehicle maintenance. Look for a heavy workbench made of solid wood or steel that includes built-in storage drawers. Drawers are perfect for keeping your most frequently used hand tools organized and easily accessible.
Install Magnetic Tool Strips
Mount magnetic metal strips along your walls or workbench to securely hold small metal pieces like screws, nails, washers, and drill bits. This keeps tiny hardware organized and prevents them from getting lost in the bottom of a toolbox. Magnetic strips are also an excellent way to store screwdrivers, pliers, and wrenches right where you can see them.
Maintenance Phase
Set Up a Regular Garage Cleaning Schedule
Create a recurring maintenance schedule to make sure your hard work does not go to waste. Marking quick monthly sweepings and bi-annual deep cleanings on your calendar will keep your garage in pristine condition year-round.
Keep the Whole Family Involved
Involve everyone in the household in maintaining the cleanliness and organization of the space. Assign simple tasks, like sweeping the floor or returning outdoor gear to the correct bin, to share the responsibility. This teaches everyone to respect the organization system and keeps clutter from building up.
Celebrate Your Clean Space
Take a step back and appreciate all the hard work you put into the cleanout. Turning a messy, overflowing garage into a clean, functional room is a massive accomplishment! Take a moment to enjoy your wide-open floor space and newly organized home.
By following these practical phases, you will easily clean out your clutter, organize your belongings, and keep your garage functional for years to come.
If you run into heavy oil stains, built-up grime, or mold damage that you cannot clean on your own, contact the local property cleaning experts at Mobi Cleaning. Let us handle the heavy scrubbing so you can enjoy a spotless BC home!
Call Us
778.801.8595
SEND US AN EMAIL
book@mobicleaning.ca
Text Us
778.801.8595
Contact Us For Cleaning Services
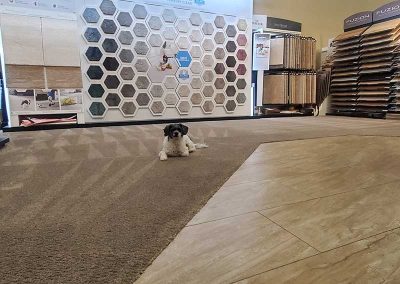
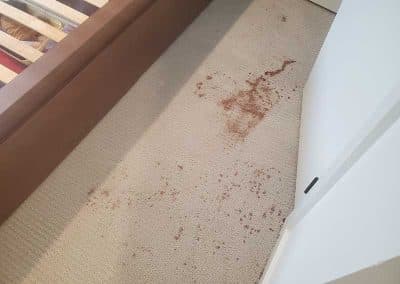
Real Results
We take tremendous pride in the results we deliver for our clients. The photos speak for themselves.
Why Choose Us
Business License, Criminal Record Check, Trained Technicians, Professional Tools, Professional Solutions, Better Results and Quality, Transparent Pricing and no Hidden Fees, Health Benefits, Professional Operation of Tools, Mobi Cleaning Difference, Flexible Scheduling, On-Time, Maintenance, Great Competitive Value, Customer Satisfaction Focused, IICRC Trained, Green Cleaning, Reputation, Property Protection, Fast Drying Carpets, 100 Percent Satisfaction Guarantee, Experience, Professional Processes, First-Class Service, Fast Response Time, Free Consultation and Estimates, Competitive Pricing and Dedicated Account Manager


